Billing & usage
Check your plan and metered usage, pick Starter, Growth, or Scale, and manage your subscription through Stripe
Billing lives at Settings → Billing — open it from Billing in the account menu or the usage meter at the bottom of the sidebar. Hosted Clanker Support is usage-based: every AI response your agent sends counts toward your plan's monthly quota, and this page is where you watch that number, choose a plan, and manage the subscription.
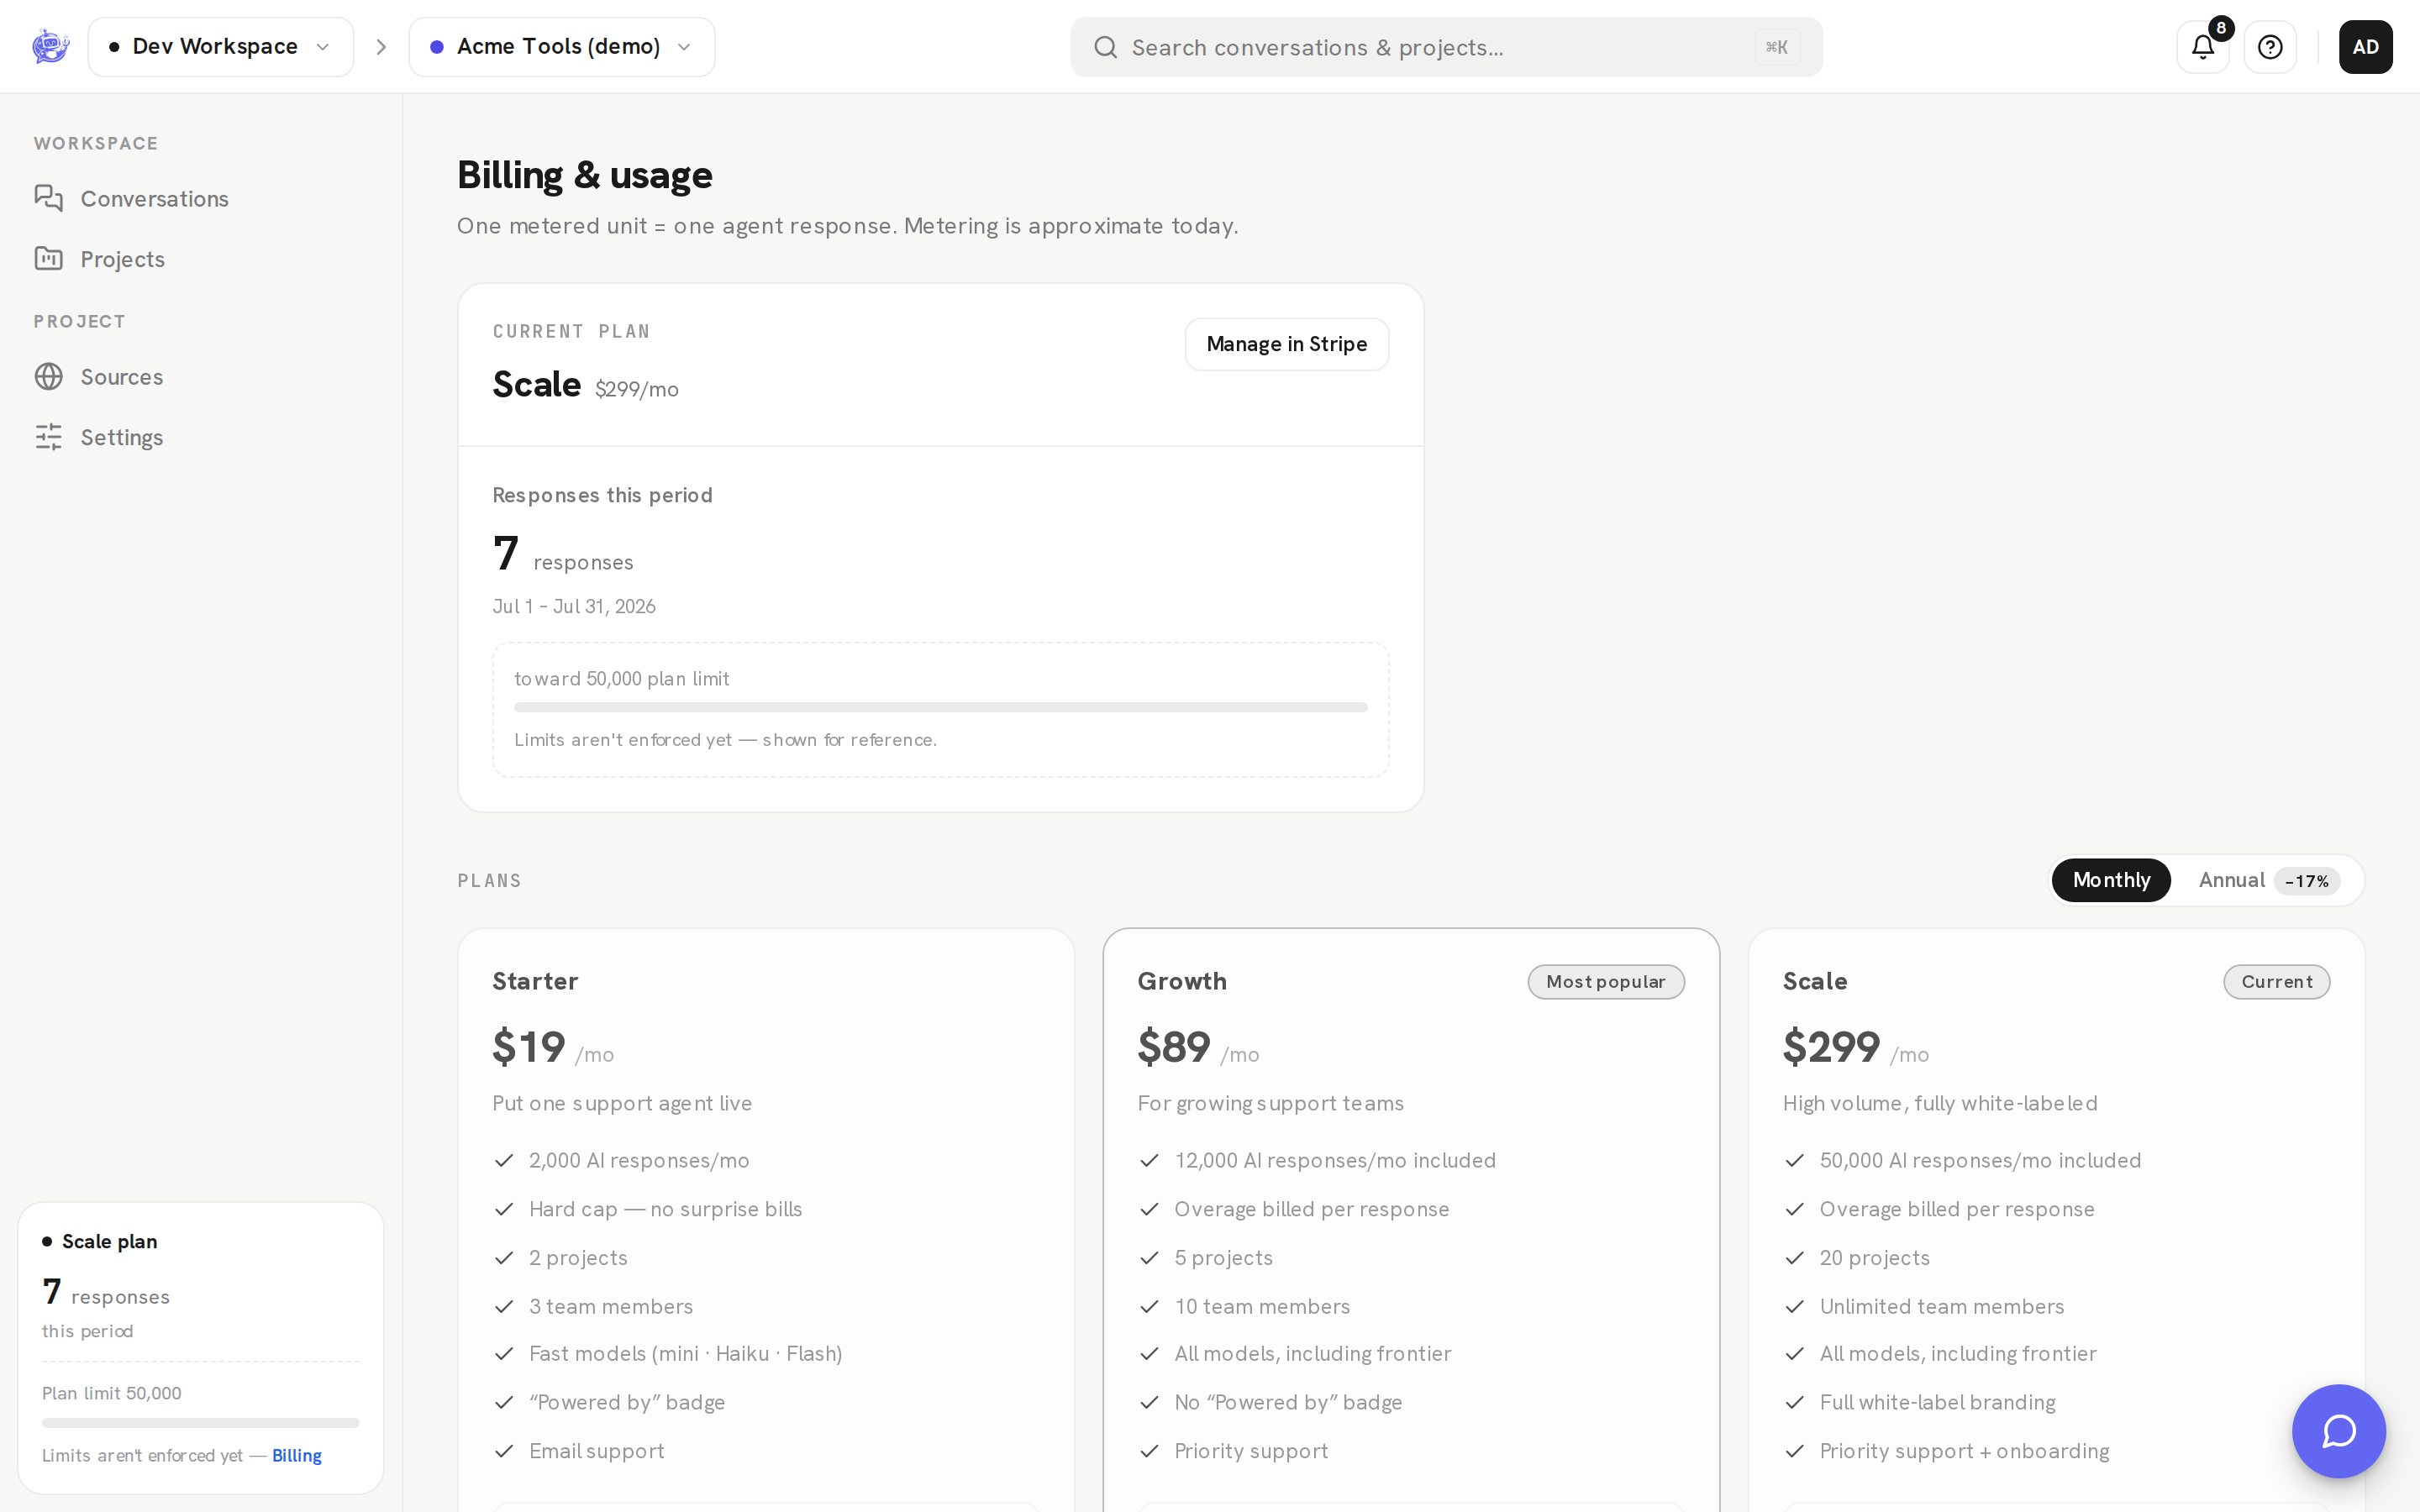
Your current plan
The card at the top reflects your workspace's live state:
| Item | What it shows | | ------------------------- | ---------------------------------------------------------------------------------------------------------------------------------- | | Plan | Your current tier and its price | | Manage in Stripe | Opens the Stripe billing portal — update your payment method, download invoices, or cancel. Owner only | | Responses this period | AI responses sent since the start of the current calendar month (UTC) | | Plan limit bar | Your progress toward the AI responses included in your plan, so you can see when you're approaching — or past — the included quota |
The usage meter at the bottom of the sidebar mirrors the same plan and response count from anywhere in the dashboard.
Choosing a plan
Three tiers are available: Starter, Growth (Most popular), and Scale. Use the Monthly / Annual toggle to switch the billing cadence — annual works out to roughly two months free, and each card shows the exact yearly total before you commit.
Plans differ in:
- Included AI responses per month
- What happens past the included quota — some tiers meter overage billed per response, others state a hard cap (each plan card says which)
- Number of projects and team seats
- Model access (fast models vs. all models)
- Widget branding (whether the "Powered by" badge shows)
Current limits and prices are listed on each plan card and on the pricing page.
What happens at checkout
- Click Choose <tier> — you're redirected to Stripe Checkout.
- Enter payment details. A card is required to start; there is no free tier.
- Once Stripe confirms the payment, your workspace is upgraded automatically and your agent can respond.
Billing is owner-only: only the workspace owner can start a checkout, change the plan, or open the billing portal. Other members can view the page, but the buttons are disabled with a note.
Until a workspace has an active plan, its agent isn't live — the dashboard shows an amber banner and onboarding starts with the plan picker. See Getting started.
Where usage comes from
- Each AI response the agent generates in the widget counts as one response, recorded the moment it's produced.
- Replies your teammates send from the inbox are human replies, not AI responses — they are never metered.
- The Responses this period counter resets at the start of each calendar month (UTC).
- On tiers with overage, responses beyond the included quota are metered and billed per response through Stripe; the current-plan card calls out how far over you are.