Projects
Create and manage the support agents you embed on your sites
A project is one embedded support agent: it has its own public key, knowledge base, instructions, AI model, and branding. Embed the same project on multiple pages to share one agent, or create separate projects for different sites, products, or audiences. Manage them at Projects in the sidebar (app.clankersupport.com/settings/projects).
Creating a project
Your first project is created during onboarding — the build screen ("Let's build your support agent") ends with a fully configured project. See Getting started.
To add another agent, click New Project. The dialog asks for one thing — a project name — and everything else starts with sensible defaults you can change later. Only workspace owners and admins can create projects — agents don't see the button.
Project cards
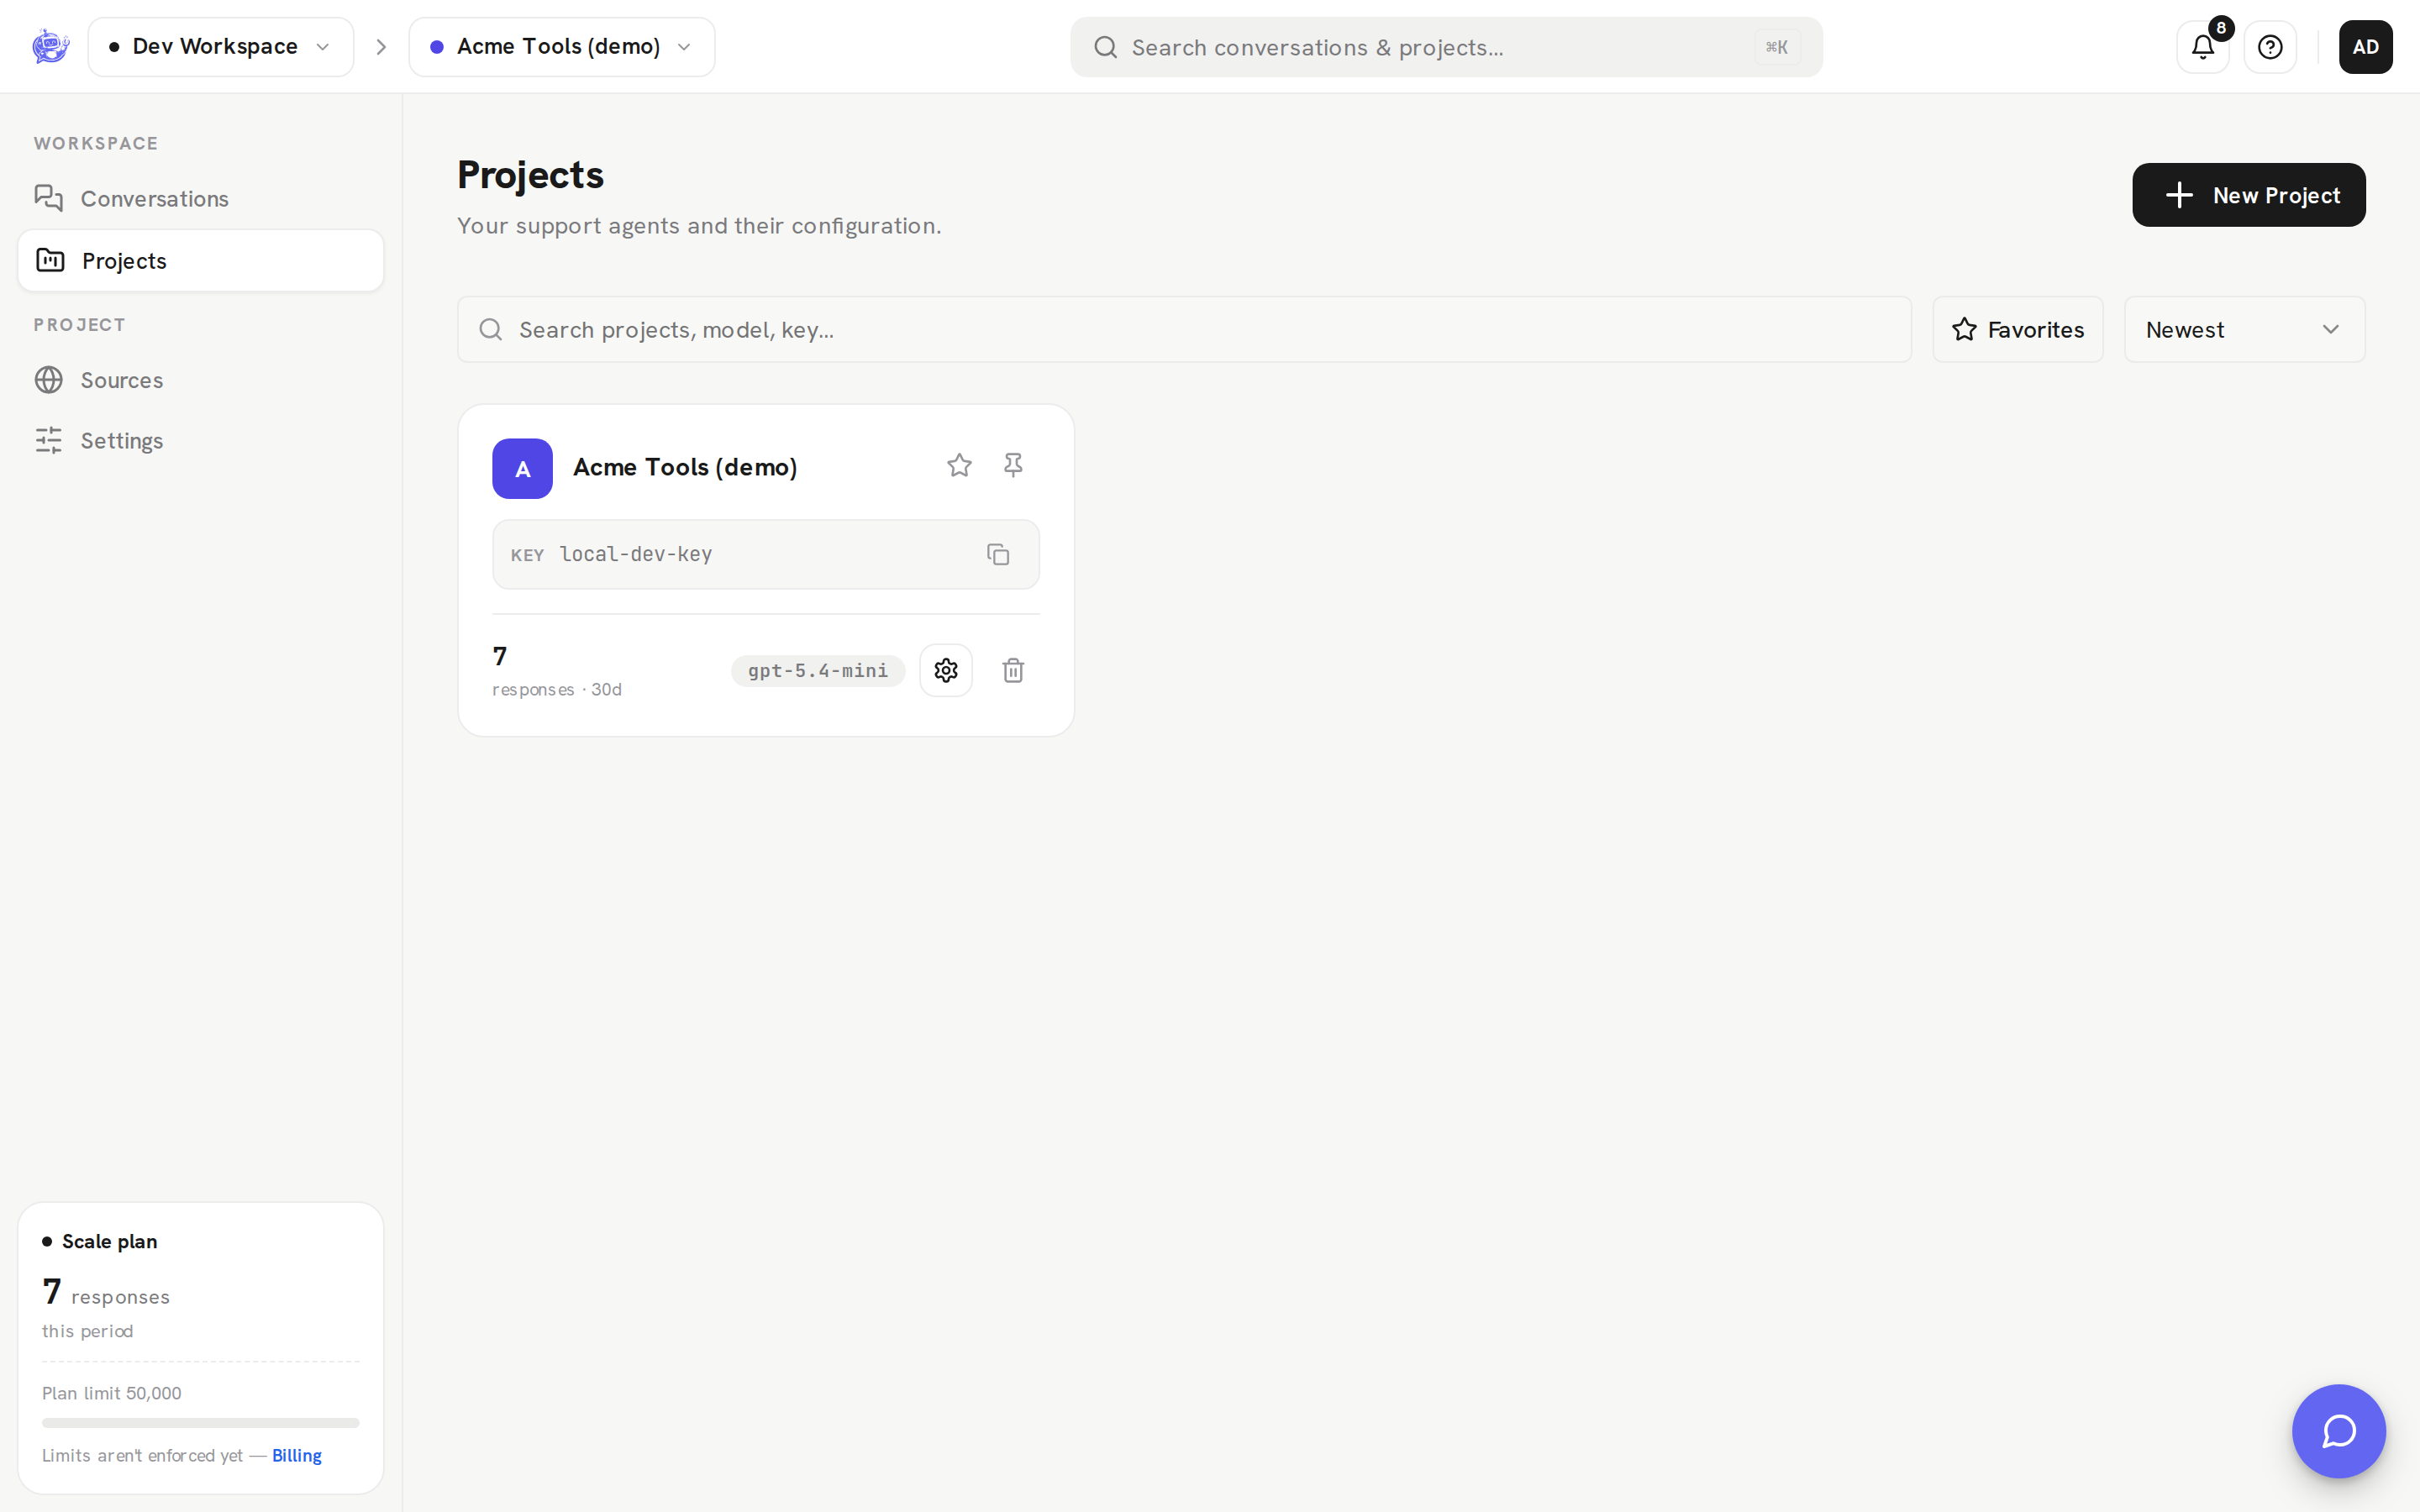
Each project renders as a card:
| Element | What it shows |
| -------------------- | ---------------------------------------------------------------------------------------------------------- |
| Name | Project name with a brand-colored initial |
| Key | The public key with a copy button — this is the data-project value in your embed snippet, safe to expose |
| Responses · 30d | AI responses this project generated in the last 30 days |
| Model badge | The AI model the project currently uses |
| Star / Pin | Favorite the project, or pin it into a Pinned section at the top of the grid |
| Configure (gear) | Opens the project's settings — General, Widget, Behavior, and Members tabs |
| Delete (trash) | Deletes the project after confirmation |
Finding projects
With more than a few projects, use the toolbar above the grid:
- Search — matches project name, model, and public key.
- Favorites — toggle to show only starred projects.
- Sort — Newest or Name (A–Z).
Pinned projects always sit in their own section on top, with everything else under All projects.
Configuring a project
Click Configure on a card (or select the project and open Settings in the sidebar) to reach its settings tabs:
- General — agent name and the danger zone.
- Widget — brand color, welcome message, live preview, and the install snippet.
- Behavior — model picker, instructions, and escalation settings.
- Members — workspace members and roles.
The knowledge base lives under Sources in the sidebar once a project is selected.
Deleting a project
Click the trash icon on a card and confirm. Deletion is permanent: all conversations and data for the project are removed, and the widget embedded with its key stops working. The dialog shows Deleting… until the server confirms, so a failed delete never silently passes.